Editing Photos From the dPS Community
As I get started here, I want to emphasize something:
There is no one right
approach to editing a photo, and there is no one ideal style, either. Images can be edited in many different ways and many different styles, and the results can all be very compelling.
A lot of folks, when first diving into post-processing workflows, are worried that they’re not editing an image “correctly” - when, in fact, there are many “correct” workflows and “correct” editing goals!
So if you don’t like the edits that I share below, or you don’t love the approaches that I discuss, you don’t have to believe that you’re wrong and I’m right (or the reverse). We could just have different preferences and different approaches - at the end of the day, it’s art, after all!
Okay, with that out of
the way, let’s turn to this very compelling street/industrial scene from Trina S:
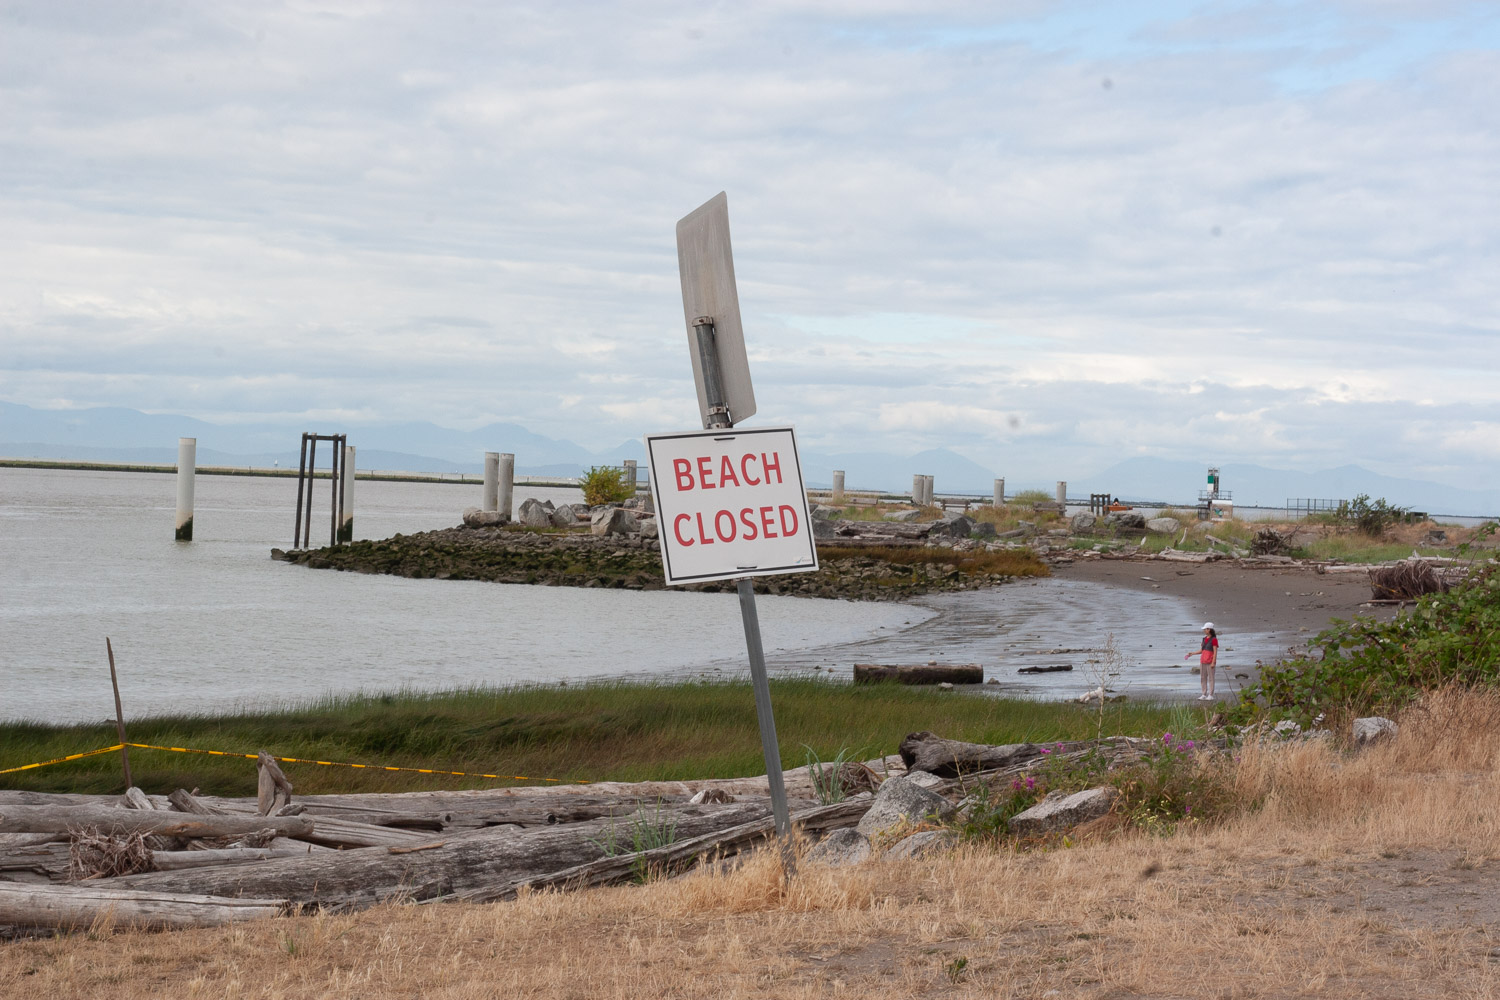
Now, when starting with an edit, it’s useful to consider what your goals are - what do you want to do by editing the image? Of course, your goals can change as you
progress, as you move sliders and make adjustments, but having a rough endpoint in mind is generally helpful.
And in general, there are a few broad goals to think about as you work:
- Dynamism - you often want to guide the viewer’s eye around the frame rather than keeping it in one single spot
- Emphasizing the main subject - you often want to ultimately push the viewer’s eye toward a certain focal point, the thing that matters most in the image
- Depth or three-dimensionality - you often want to give the scene the illusion of depth, so that the viewer feels like they could reach out and touch the contents
- Harmony/simplicity - you often want to ensure that the image has a sense of visual coherence
and that everything blends together nicely
- Mood - you often want to ensure that the image has a particular effect on the viewer, whether that’s uplifting, dark, dramatic, etc.
(Not every image requires all of these different elements, but most great images involve at least three or four of them.)
Keeping those goals in mind, my first move is going to be to crop this image. I love the way the foreground sweeps toward the midground in a sort of c-curve shape - it’s very dynamic and does a great job of moving the eye along - but the area along the left-hand side of the image is primarily just empty water. Therefore, I’m going to crop in slightly to remove that dead space.
I’m also going to crop in slightly on the right to focus further on the main area of interest.
As I do that, I’m going to straighten the image, as the horizon is slightly crooked. (This is a very easy element to miss, but it’s extremely important - without a straight horizon, the entire image will look off!)

Next, I’m going to consider the image’s tones - that is, its distribution of shadows, midtones, and highlights.
Trina has done a good job of maintaining detail throughout the entire file; there’s information in the darkest shadows, and there is information in the brightest highlights, as well. But as a result, the image is slightly dark, so I’m going to go ahead and increase the exposure by
around a stop. As a result, the sky becomes brighter, and we get a better look at the darker elements in the foreground, adding to the image’s three-dimensionality.
Like many unedited RAW files, the image still suffers from two tonal problems:
- It’s fairly flat (i.e., low
contrast)
- The darker portions of the image feel very muddy (i.e., they’re lacking in detail - the shadows are too strong)
These are issues that I encounter consistently in RAW files, especially those images that include very bright elements such as sky. Fortunately, they can be solved rather simply:
- By adding some contrast (using the Contrast slider generally works well!)
- By boosting the shadows (editing programs usually offer a Shadows slider)
It can also be useful to play with the other tonal sliders (the Highlights, the Whites, and the Blacks) while you make these adjustments. Dropping the Highlights is common in images that
feature sky - to emphasize cloud detail - and many photographers like to reduce the Blacks while increasing the Shadows to stretch the image across the full tonal spectrum (so that the shot features true, deep blacks but also plenty of shadow detail).
Personally, however, I prefer softer shadows in this type of image - it gives a slightly more filmic, vintage feel, which helps set
the mood. Therefore, instead of dropping the Blacks, I’m going to boost them.

At that point, I feel pretty decent about the overall tones. Sure, I could play around with the tonal sliders more to create different effects, but the general look is nice, so I’m going to move on to the next step: color adjustments.
When it comes to working with color, you can keep things very simple, or you can make them very, very complex. I love warmer (i.e., yellower) images, so I’ll often increase the Temperature slider for a warmer effect. In this case, the overall temperature seems pretty good, but I think I’ll add some oranges into the shadows for a subtle warming boost. (In Lightroom, you can do this in the Color Grading
panel.)

Is this personal preference? Yes, absolutely. But warmth pushes the vintage effect further, making the image feel (at least to me!) like it could have been shot on a film camera back in the 1980s.
At that point, I’m quite liking how the photo looks - there’s lots of detail, which creates three-dimensionality, and there’s a nostalgic, vintage mood - so it might be reasonable to just add a bit of sharpening to ensure crispness and then export the file.
Though before I do that, I’m noticing one more thing: dust spots! Over time, camera
sensors attract dust, which creates little blotches in bright portions of your photos. (In this case, they’re very visible in the sky!) They’re easy to handle using a healing tool or a clone-stamp tool - I cleaned these up in just a few seconds using Lightroom’s Content-Aware Remove tool.

However, I mentioned earlier that images can be edited multiple ways, which I’d like to demonstrate
here!
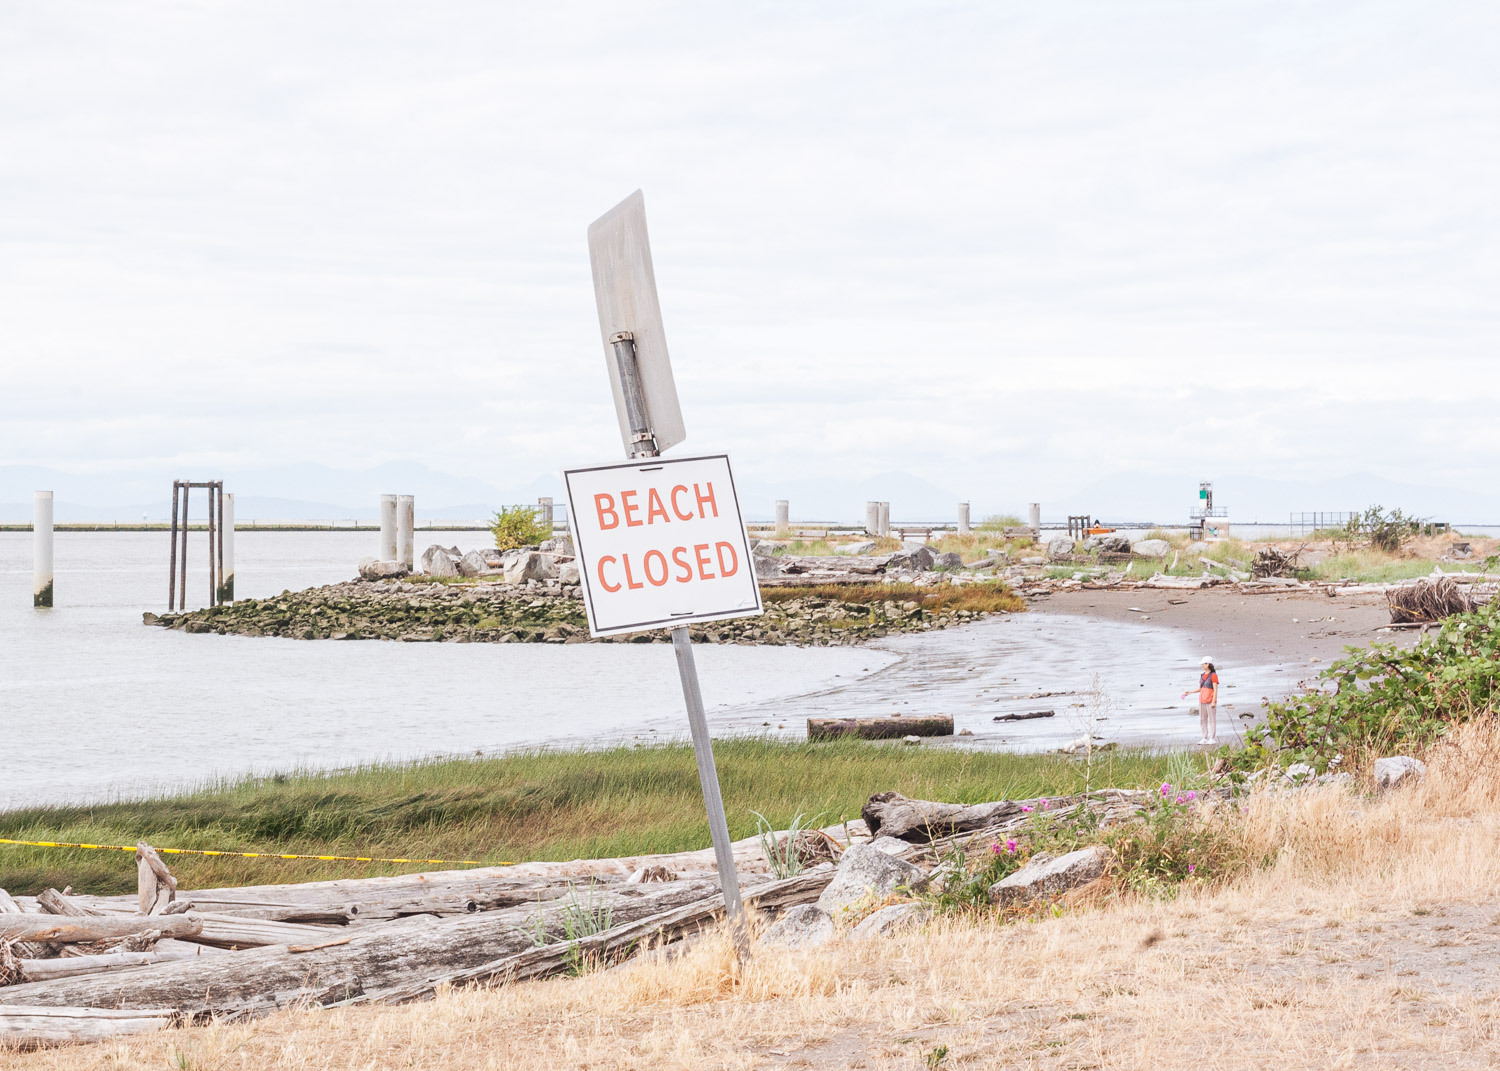
For instance, one of my favorite ways to achieve greater harmony is by adjusting the colors to reduce the number of distinct hues in the file. Specifically, instead of including a rainbow of dominant colors, I’d like to have 2-3.
In this image, I’m seeing yellows/oranges in the foreground grass,
blues in the sky and water, greens in the more distant grasses and plants, and reds on the sign and the person’s shirt. It’s not a huge number of colors, but to my eye, it could be simplified slightly, plus the reds feel a bit too intense.
Therefore, I’m going to head into the Lightroom HSL panel and make the reds more orange and the greens a bit yellower, thus increasing the overlap between the
yellow/orange, red, and green parts of the frame.
In pursuit of that vintage vibe, I’m also going to reduce the saturation of most of the colors - and because I like warmth and the blues are a bit strong in the sky, I’m going to reduce the saturation of the blues especially heavily.
I’m also
going to add a bit of texture - using Lightroom’s Texture slider - to increase the level of detail. And as a final touch, I’m going to remove the oranges I added to the image shadows, and instead give the entire file a slight orange tint for a slightly different vintage effect.
Of course, there are still more edits that I could
try! For instance, by adjusting the overall color grade from orange to green, and by using some negative Dehaze, I can create a hazier shot:
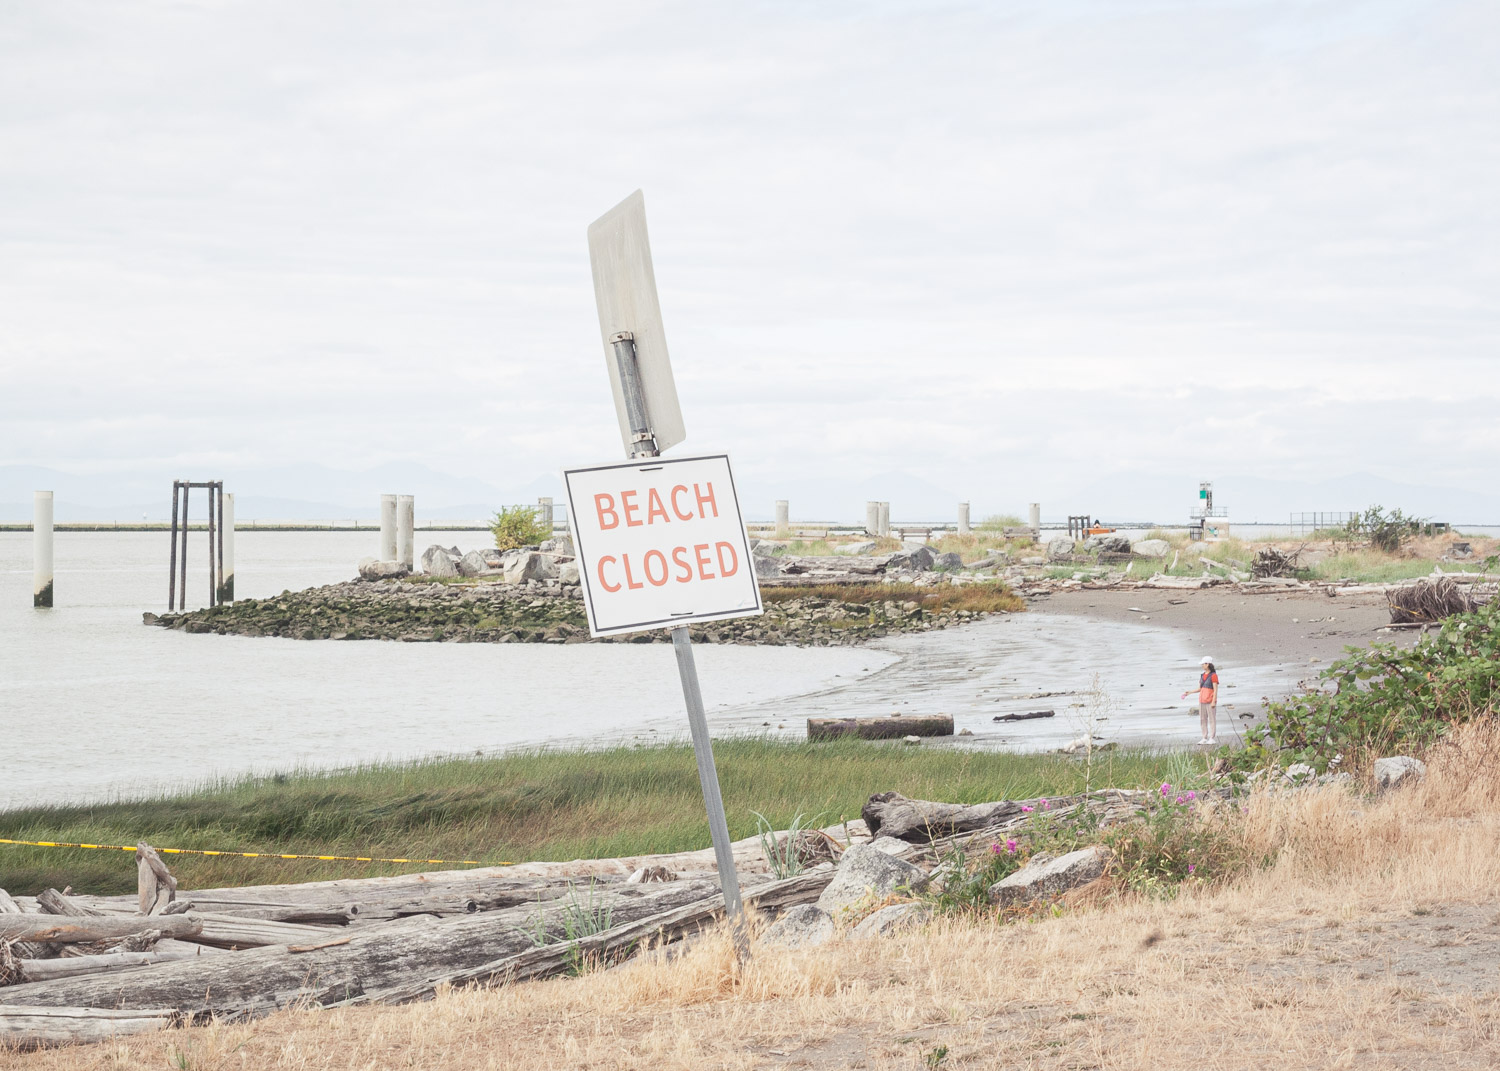
Or I can lift the shadows even further, then use a brush to bring back detail in the sky and warm it up a tad:

In other words, there is a lot you can do with a single image!
Second, we have a beautiful landscape image from Jennifer S:

At least for me, editing landscapes is much more involved and time-consuming than editing almost any other type of photo. It’s also more complex, and it involves a lot of trial and error.
To give you an idea, I generally spend 4-8 hours editing a landscape image like this one!
Now, I’ve done a quicker edit for this newsletter, so please forgive me if the image looks a bit rough, but I hope it at least gives you a sense of how you might approach a landscape post-processing session. Given the complexity of the edit, however, instead of showing you every single adjustment, I’d like to share the final product, then talk you through the step-by-step approach I used.
First, here’s the final edit:

Second, the approach:
- Cropping: I cropped a tad off the top and sides of the image to emphasize the main
subjects (the foreground grasses and the rock structure in the background), as well as to eliminate some of the empty space in the sky.
- Tonal adjustments: I lifted the shadows and decreased the highlights to bring back plenty of detail to the foreground and the sky. I also boosted the overall exposure slightly, and I added some contrast to give the various elements a greater sense of three-dimensionality.
- Color
adjustments: I tweaked the image hues slightly for a more harmonious color palette, and I specifically desaturated the blues to get rid of stronger cool tones in the sky. To give a pop of color to the entire image and to unify the scene, I boosted the saturation and vibrance slightly, then I added some reds into the midtones and some yellows into the shadows.
- Detail adjustments: I added some sharpening, texture, clarity, and dehaze for increased crispness and
three-dimensionality.
- Vignettes: Here’s where things get complicated! I added several local adjustments to guide the viewer’s eye toward the rock structure in the background: a dark linear gradient in the foreground, several dark linear gradients in the sky, and several dark radial gradients across the entire frame.
- Dodging & burning: Using a brush, I “painted” some light along the brighter parts of the foreground, the
midground, and the rocks in the background. Then I did the opposite with the dark parts. The goal here is to add three-dimensionality to the scene, and when done very carefully, it can be extremely effective! (I worked pretty quickly, so the result is a little heavy-handed.)
- Haze: To give the scene a little more oomph, I used a brush - as well as some radial gradients - to add hazy light around the brightest part of the sky (just above the rock structure). For
some, this is likely a step too far, but it’s worth emphasizing that this effect is commonly used by professional landscape photographers.
Whew! Hopefully, all that was useful to you! As I said at the start of this email, please let me know what you thought - was the editing helpful? Is there anything I could do differently to make it more helpful?
Talk to you next Saturday!
Jaymes Dempsey (and the dPS team)